m (changed filenames) |
(added info about removal) Tag: B35 |
||
| (30 intermediate revisions by 10 users not shown) | |||
| Line 1: | Line 1: | ||
| + | {{Removed}} |
||
{{Infobox Trading NPC |
{{Infobox Trading NPC |
||
| + | |Image = NearHaradTraders.png |
||
| − | |title = Near Harad Traders |
||
|armour = None |
|armour = None |
||
| − | |armour points = |
+ | |armour points = {{bar|armour|size=infobox}} |
| − | |Image = [[File:NearHaradTraders.png|thumb]] |
||
|health = 20 |
|health = 20 |
||
| − | |alignment needed = |
+ | |alignment needed = 0 (for mineral, drink, food, and plant traders)<br />50 (for blacksmith) |
|attack strength = Do not attack |
|attack strength = Do not attack |
||
| − | |alignment = [[ |
+ | |alignment = [[Near Harad (Faction)|Near Harad]] |
| − | |spawn = [[ |
+ | |spawn = [[Southron Village#Southron Bazaar|Southron bazaars]] |
| − | |drops = |
+ | |drops = [[Bone]]s, [[Silver Coin|silver coins]], [[:Category:Ingots|iron and bronze ingots]] (blacksmiths only) |
|buys = See article |
|buys = See article |
||
|sells = See article |
|sells = See article |
||
| + | |added in = {{update|17}} (as Near Harad Traders)<br />{{update|32}} (renamed)<br />{{update|33}} (blacksmiths added) |
||
| − | |added in = 17}} |
||
| + | |removed in = {{update|34}} (Redesign of Near Harad)}} |
||
| + | ''Note: These traders are no longer included in the Mod. They got replaced in {{update|34}} by'' |
||
| + | * ''[[Umbar Traders]]'' |
||
| + | * ''[[Coast Southron Traders]]'' |
||
| + | * ''[[Harnedor Traders]]'' |
||
| + | * ''[[Nomad Traders]]'' |
||
| + | * ''[[Gulfing Traders]]'' |
||
| − | ''' |
+ | '''Southron traders''' are specialized [[Trading|trading NPCs]] that spawn in [[Southron Village#Southron Bazaar|bazaars]], which can be found in [[Southron Village|Southron villages]]. Each bazaar will spawn four different booths, each containing one of the following five traders. It is possible for two (or more) of the same kind of trader to be found in the same bazaar. |
| − | *[[# |
+ | *[[#Southron Mineral Trader|Mineral traders]] |
| − | **The |
+ | **The Southron mineral traders are NPC traders that sell mining goods. |
| − | **They will buy mining equipment for example: torches and pickaxes |
+ | **They will buy mining equipment for example: torches and pickaxes. |
| − | *[[# |
+ | *[[#Southron Drink Trader|Drink traders]] |
| − | **The |
+ | **The drink traders sell a variety of beverages. |
**They will buy brewing ingredients such as carrots, apples, wheat and sugarcane; as well as objects needed for the brewing process, such as buckets and clay mugs. |
**They will buy brewing ingredients such as carrots, apples, wheat and sugarcane; as well as objects needed for the brewing process, such as buckets and clay mugs. |
||
| − | *[[# |
+ | *[[#Southron Food Trader|Food traders]] |
| − | ** |
+ | **The food traders sell food of all types including cooked meat and fruit. |
| − | **They buy raw food and buckets |
+ | **They buy raw food and buckets. |
| − | *[[# |
+ | *[[#Southron Plant Trader|Plant traders]] |
| − | ** |
+ | **Southron plant traders sell flowers, crops, mushrooms, and saplings. |
**They buy tree-farming equipment such as axes, water and bonemeal, etc. |
**They buy tree-farming equipment such as axes, water and bonemeal, etc. |
||
| + | *[[#Southron Blacksmith|Blacksmiths]] |
||
| + | **Southron blacksmiths sell armour, weapons, and iron and bronze bars. |
||
| + | **They buy coal, ingots, gems, leather, and bottles of poison. |
||
| − | Upon trading with |
+ | Upon trading with a Southron mineral, drink, food, or plant trader, the player earns the [[Achievements|achievement]] "'''Desert Riches'''"; while the achievement "'''Bronzen Corselets'''" is earned by trading with a Southron blacksmith. |
More detailed information about what items each trader buys and sells can be found below. |
More detailed information about what items each trader buys and sells can be found below. |
||
| − | == |
+ | == Southron Mineral Trader == |
[[File:HaradMineralTrader.png|thumb]] |
[[File:HaradMineralTrader.png|thumb]] |
||
=== Items Sold === |
=== Items Sold === |
||
| − | Below is a table of values for each item that the player is available to purchase from this NPC. Use this table to find out if your |
+ | Below is a table of values for each item that the player is available to purchase from this NPC. Use this table to find out if your trader is giving you a good deal or not. Please note that the values in the below tables are of the average prices in silver coins only and players may encounter NPC’s with better or worse deals. Each trader will not have every item listed for sale. |
| − | |||
| − | (Note: Table values are general guides only. Some traders many have outlying prices) |
||
{| class="article-table mw-collapsible mw-collapsed" border="0" cellpadding="1" cellspacing="1" style="width: 500px;" |
{| class="article-table mw-collapsible mw-collapsed" border="0" cellpadding="1" cellspacing="1" style="width: 500px;" |
||
| Line 46: | Line 54: | ||
! scope="col" |Price Range |
! scope="col" |Price Range |
||
! scope="col" |Image |
! scope="col" |Image |
||
| + | |- |
||
| + | |[[Haradric Crafting Table]] |
||
| + | |{{Bar|price|40}} |
||
| + | |[[File:Haradric Crafting Table.png|32px]] |
||
|- |
|- |
||
|2 x [[Coal]] |
|2 x [[Coal]] |
||
| − | |{{Bar| |
+ | |{{Bar|price|4}} |
|[[File:Coal.png|32px]] |
|[[File:Coal.png|32px]] |
||
|- |
|- |
||
|4 x [[Glowstone Dust]] |
|4 x [[Glowstone Dust]] |
||
| − | |{{Bar| |
+ | |{{Bar|price|3}} |
|[[File:GlowstoneDust.png|32px]] |
|[[File:GlowstoneDust.png|32px]] |
||
|- |
|- |
||
|[[Copper Ore]] |
|[[Copper Ore]] |
||
| − | |{{Bar| |
+ | |{{Bar|price|7}} |
|[[File:CopperOre.png|32px]] |
|[[File:CopperOre.png|32px]] |
||
|- |
|- |
||
| − | |Flint |
+ | |{{VanillaLink|Flint}} |
| − | |{{Bar| |
+ | |{{Bar|price|2}} |
|[[File:Flint.png|32px]] |
|[[File:Flint.png|32px]] |
||
|- |
|- |
||
| − | |Gold Ore |
+ | |{{VanillaLink|Gold_Ore|Gold Ore}} |
| − | |{{Bar| |
+ | |{{Bar|price|22}} |
|[[File:GoldOre.png|32px]] |
|[[File:GoldOre.png|32px]] |
||
|- |
|- |
||
| − | |Iron Ore |
+ | |{{VanillaLink|Iron_Ore|Iron Ore}} |
| − | |{{Bar| |
+ | |{{Bar|price|8}} |
|[[File:IronOre.png|32px]] |
|[[File:IronOre.png|32px]] |
||
|- |
|- |
||
| − | |Lapis Lazuli |
+ | |{{VanillaLink|Lapis_Lazuli|Lapis Lazuli}} |
| − | |{{Bar| |
+ | |{{Bar|price|1}} |
|[[File:LapisLazuli.png|32px]] |
|[[File:LapisLazuli.png|32px]] |
||
|- |
|- |
||
| − | |Lava Bucket |
+ | |{{VanillaLink|Lava|Lava Bucket}} |
| − | |{{Bar| |
+ | |{{Bar|price|20}} |
|[[File:LavaBucket.png|32px]] |
|[[File:LavaBucket.png|32px]] |
||
|- |
|- |
||
| − | |[[ |
+ | |[[Nitre]] |
| − | |{{Bar| |
+ | |{{Bar|price|6}} |
| − | |[[File: |
+ | |[[File:Nitre.png|32px]] |
|- |
|- |
||
|[[Silver Ore]] |
|[[Silver Ore]] |
||
| − | |{{Bar| |
+ | |{{Bar|price|12}} |
|[[File:SilverOre.png|32px]] |
|[[File:SilverOre.png|32px]] |
||
|- |
|- |
||
|[[Sulfur]] |
|[[Sulfur]] |
||
| − | |{{Bar| |
+ | |{{Bar|price|6}} |
|[[File:Sulphur.png|32px]] |
|[[File:Sulphur.png|32px]] |
||
|- |
|- |
||
|[[Tin Ore]] |
|[[Tin Ore]] |
||
| − | |{{Bar| |
+ | |{{Bar|price|7}} |
|[[File:TinOre.png|32px]] |
|[[File:TinOre.png|32px]] |
||
| + | |- |
||
| + | |[[Salt]] |
||
| + | |{{Bar|price|16}} |
||
| + | |[[File:Salt.png|32px]] |
||
| + | |- |
||
| + | |[[Diamond]] |
||
| + | |{{Bar|price|40}} |
||
| + | |[[File:Diamond.png|32px]] |
||
| + | |- |
||
| + | |[[Emerald]] |
||
| + | |{{Bar|price|25}} |
||
| + | |[[File:Emerald.png|32px]] |
||
| + | |- |
||
| + | |[[Sapphire]] |
||
| + | |{{Bar|price|20}} |
||
| + | |[[File:Sapphire.png|32px]] |
||
| + | |- |
||
| + | |[[Ruby]] |
||
| + | |{{Bar|price|20}} |
||
| + | |[[File:Ruby.png|32px]] |
||
| + | |- |
||
| + | |[[Opal]] |
||
| + | |{{Bar|price|15}} |
||
| + | |[[File:Opal.png|32px]] |
||
| + | |- |
||
| + | |[[Amber]] |
||
| + | |{{Bar|price|15}} |
||
| + | |[[File:Amber.png|32px]] |
||
| + | |- |
||
| + | |[[Amethyst]] |
||
| + | |{{Bar|price|12}} |
||
| + | |[[File:Amethyst.png|32px]] |
||
| + | |- |
||
| + | |[[Topaz]] |
||
| + | |{{Bar|price|12}} |
||
| + | |[[File:Topaz.png|32px]] |
||
|} |
|} |
||
=== Items Bought === |
=== Items Bought === |
||
| − | Below is a table of values for each item that the player can sell to this NPC. Use this table to earn more money by only selling when the prices are high. Please note that the values in the below tables are of the average prices in |
+ | Below is a table of values for each item that the player can sell to this NPC. Use this table to earn more money by only selling when the prices are high. Please note that the values in the below tables are of the average prices in silver coins only and players may encounter NPC’s with better or worse deals. You will not be able to sell every item to every trader as they will not want to purchase every item listed below. |
{| class="article-table mw-collapsible mw-collapsed" border="0" cellpadding="1" cellspacing="1" style="width: 500px;" |
{| class="article-table mw-collapsible mw-collapsed" border="0" cellpadding="1" cellspacing="1" style="width: 500px;" |
||
| Line 106: | Line 154: | ||
! scope="col" |Image |
! scope="col" |Image |
||
|- |
|- |
||
| − | |16 x Torch |
+ | |16 x [[Torch]] |
| − | |{{Bar| |
+ | |{{Bar|price|2}} |
|[[File:Torch.png|32px]] |
|[[File:Torch.png|32px]] |
||
|- |
|- |
||
|[[Bronze Equipment|Bronze Pickaxe]] |
|[[Bronze Equipment|Bronze Pickaxe]] |
||
| − | |{{Bar| |
+ | |{{Bar|price|6}} |
|[[File:PickaxeBronze.png|32px]] |
|[[File:PickaxeBronze.png|32px]] |
||
|- |
|- |
||
| − | |Bucket |
+ | |[[Bucket]] |
| − | |{{Bar| |
+ | |{{Bar|price|3}} |
|[[File:Bucket.png|32px]] |
|[[File:Bucket.png|32px]] |
||
|- |
|- |
||
| − | |Iron Pickaxe |
+ | |{{VanillaLink|Pickaxe|Iron Pickaxe}} |
| − | |{{Bar| |
+ | |{{Bar|price|8}} |
|[[File:PickaxeIron.png|32px]] |
|[[File:PickaxeIron.png|32px]] |
||
|- |
|- |
||
| − | |Stone Pickaxe |
+ | |{{VanillaLink|Pickaxe|Stone Pickaxe}} |
| − | |{{Bar| |
+ | |{{Bar|price|1}} |
|[[File:PickaxeStone.png|32px]] |
|[[File:PickaxeStone.png|32px]] |
||
| − | |- |
||
| − | |Wooden Pickaxe |
||
| − | |{{Bar|coins|1}} |
||
| − | |[[File:PickaxeWooden.png|32px]] |
||
|} |
|} |
||
| − | == |
+ | == Southron Drink Trader == |
[[File:HaradDrinkTrader.png|thumb]] |
[[File:HaradDrinkTrader.png|thumb]] |
||
=== Items Sold === |
=== Items Sold === |
||
| − | Below is a table of values for each item that the player is available to purchase from this NPC. Use this table to find out if your |
+ | Below is a table of values for each item that the player is available to purchase from this NPC. Use this table to find out if your trader is giving you a good deal or not. Please note that the values in the below tables are of the average prices in silver coins only and players may encounter NPC’s with better or worse deals. Each trader will not have every item listed for sale. |
| − | |||
| − | (Note: Table values are general guides only. Some traders many have outlying prices) |
||
{| class="article-table mw-collapsible mw-collapsed" border="0" cellpadding="1" cellspacing="1" style="width: 500px;" |
{| class="article-table mw-collapsible mw-collapsed" border="0" cellpadding="1" cellspacing="1" style="width: 500px;" |
||
| Line 146: | Line 188: | ||
|- |
|- |
||
|[[Ale|Ale (Light)]] |
|[[Ale|Ale (Light)]] |
||
| − | |{{Bar| |
+ | |{{Bar|price|7.5}} |
|[[File:Ale.png|32px]] |
|[[File:Ale.png|32px]] |
||
|- |
|- |
||
|[[Ale|Ale (Moderate)]] |
|[[Ale|Ale (Moderate)]] |
||
| − | |{{Bar| |
+ | |{{Bar|price|10}} |
|[[File:Ale.png|32px]] |
|[[File:Ale.png|32px]] |
||
|- |
|- |
||
|[[Ale|Ale (Strong)]] |
|[[Ale|Ale (Strong)]] |
||
| − | |{{Bar| |
+ | |{{Bar|price|12.5}} |
|[[File:Ale.png|32px]] |
|[[File:Ale.png|32px]] |
||
| + | |- |
||
| + | |[[Apple Juice]] |
||
| + | |{{Bar|price|8}} |
||
| + | |[[File:AppleJuice.gif|32px]] |
||
|- |
|- |
||
|[[Araq|Araq (Light)]] |
|[[Araq|Araq (Light)]] |
||
| − | |{{Bar| |
+ | |{{Bar|price|9}} |
|[[File:Araq.png|32px]] |
|[[File:Araq.png|32px]] |
||
|- |
|- |
||
|[[Araq|Araq (Moderate)]] |
|[[Araq|Araq (Moderate)]] |
||
| − | |{{Bar| |
+ | |{{Bar|price|12}} |
|[[File:Araq.png|32px]] |
|[[File:Araq.png|32px]] |
||
|- |
|- |
||
|[[Araq|Araq (Strong)]] |
|[[Araq|Araq (Strong)]] |
||
| − | |{{Bar| |
+ | |{{Bar|price|15}} |
|[[File:Araq.png|32px]] |
|[[File:Araq.png|32px]] |
||
|- |
|- |
||
|[[Banana Beer|Banana Beer (Light)]] |
|[[Banana Beer|Banana Beer (Light)]] |
||
| − | |{{Bar| |
+ | |{{Bar|price|7.5}} |
|[[File:Banana Beer.png|32px]] |
|[[File:Banana Beer.png|32px]] |
||
|- |
|- |
||
|[[Banana Beer|Banana Beer (Moderate)]] |
|[[Banana Beer|Banana Beer (Moderate)]] |
||
| − | |{{Bar| |
+ | |{{Bar|price|10}} |
|[[File:Banana Beer.png|32px]] |
|[[File:Banana Beer.png|32px]] |
||
|- |
|- |
||
|[[Banana Beer|Banana Beer (Strong)]] |
|[[Banana Beer|Banana Beer (Strong)]] |
||
| − | |{{Bar| |
+ | |{{Bar|price|12.5}} |
|[[File:Banana Beer.png|32px]] |
|[[File:Banana Beer.png|32px]] |
||
|- |
|- |
||
|[[Cherry Liqueur|Cherry Liqueur (Light)]] |
|[[Cherry Liqueur|Cherry Liqueur (Light)]] |
||
| − | |{{Bar| |
+ | |{{Bar|price|9}} |
|[[File:Cherry Liqueur.png|32px]] |
|[[File:Cherry Liqueur.png|32px]] |
||
|- |
|- |
||
|[[Cherry Liqueur|Cherry Liqueur (Moderate)]] |
|[[Cherry Liqueur|Cherry Liqueur (Moderate)]] |
||
| − | |{{Bar| |
+ | |{{Bar|price|12}} |
|[[File:Cherry Liqueur.png|32px]] |
|[[File:Cherry Liqueur.png|32px]] |
||
|- |
|- |
||
|[[Cherry Liqueur|Cherry Liqueur (Strong)]] |
|[[Cherry Liqueur|Cherry Liqueur (Strong)]] |
||
| − | |{{Bar| |
+ | |{{Bar|price|15}} |
|[[File:Cherry Liqueur.png|32px]] |
|[[File:Cherry Liqueur.png|32px]] |
||
| + | |- |
||
| + | |[[Chocolate]] |
||
| + | |{{Bar|price|4}} |
||
| + | |[[File:Chocolate.gif|32px]] |
||
|- |
|- |
||
|[[Cider|Cider (Light)]] |
|[[Cider|Cider (Light)]] |
||
| − | |{{Bar| |
+ | |{{Bar|price|7.5}} |
|[[File:Cider.png|32px]] |
|[[File:Cider.png|32px]] |
||
|- |
|- |
||
|[[Cider|Cider (Moderate)]] |
|[[Cider|Cider (Moderate)]] |
||
| − | |{{Bar| |
+ | |{{Bar|price|10}} |
|[[File:Cider.png|32px]] |
|[[File:Cider.png|32px]] |
||
|- |
|- |
||
|[[Cider|Cider (Strong)]] |
|[[Cider|Cider (Strong)]] |
||
| − | |{{Bar| |
+ | |{{Bar|price|12.5}} |
|[[File:Cider.png|32px]] |
|[[File:Cider.png|32px]] |
||
| + | |- |
||
| + | |[[Corn Liquor|Corn Liquor (Light)]] |
||
| + | |{{Bar|price|7.5}} |
||
| + | |[[File:Corn Liquor.png|32px]] |
||
| + | |- |
||
| + | |[[Corn Liquor|Corn Liquor (Moderate)]] |
||
| + | |{{Bar|price|10}} |
||
| + | |[[File:Corn Liquor.png|32px]] |
||
| + | |- |
||
| + | |[[Corn Liquor|Corn Liquor (Strong)]] |
||
| + | |{{Bar|price|12.5}} |
||
| + | |[[File:Corn Liquor.png|32px]] |
||
|- |
|- |
||
|[[Dwarven Ale|Dwarven Ale (Light)]] |
|[[Dwarven Ale|Dwarven Ale (Light)]] |
||
| − | |{{Bar| |
+ | |{{Bar|price|7.5}} |
|[[File:Dwarven Ale.png|32px]] |
|[[File:Dwarven Ale.png|32px]] |
||
|- |
|- |
||
|[[Dwarven Ale|Dwarven Ale (Moderate)]] |
|[[Dwarven Ale|Dwarven Ale (Moderate)]] |
||
| − | |{{Bar| |
+ | |{{Bar|price|10}} |
|[[File:Dwarven Ale.png|32px]] |
|[[File:Dwarven Ale.png|32px]] |
||
|- |
|- |
||
|[[Dwarven Ale|Dwarven Ale (Strong)]] |
|[[Dwarven Ale|Dwarven Ale (Strong)]] |
||
| − | |{{Bar| |
+ | |{{Bar|price|12.5}} |
|[[File:Dwarven Ale.png|32px]] |
|[[File:Dwarven Ale.png|32px]] |
||
| + | |- |
||
| + | |[[Lemonade]] |
||
| + | |{{Bar|price|8}} |
||
| + | |[[File:Lemonade.gif|32px]] |
||
| + | |- |
||
| + | |[[Lemon Liqueur|Lemon Liqueur (Light)]] |
||
| + | |{{Bar|price|9}} |
||
| + | |[[File:Lemon Liqueur.png|32px]] |
||
| + | |- |
||
| + | |[[Lemon Liqueur|Lemon Liqueur (Moderate)]] |
||
| + | |{{Bar|price|12}} |
||
| + | |[[File:Lemon Liqueur.png|32px]] |
||
| + | |- |
||
| + | |[[Lemon Liqueur|Lemon Liqueur (Strong)]] |
||
| + | |{{Bar|price|15}} |
||
| + | |[[File:Lemon Liqueur.png|32px]] |
||
| + | |- |
||
| + | |[[Lime Liqueur|Lime Liqueur (Light)]] |
||
| + | |{{Bar|price|9}} |
||
| + | |[[File:Lime Liqueur.png|32px]] |
||
| + | |- |
||
| + | |[[Lime Liqueur|Lime Liqueur (Moderate)]] |
||
| + | |{{Bar|price|12}} |
||
| + | |[[File:Lime Liqueur.png|32px]] |
||
| + | |- |
||
| + | |[[Lime Liqueur|Lime Liqueur (Strong)]] |
||
| + | |{{Bar|price|15}} |
||
| + | |[[File:Lime Liqueur.png|32px]] |
||
|- |
|- |
||
|[[Melon Liqueur|Melon Liqueur (Light)]] |
|[[Melon Liqueur|Melon Liqueur (Light)]] |
||
| − | |{{Bar| |
+ | |{{Bar|price|9}} |
|[[File:Melon Liqueur.png|32px]] |
|[[File:Melon Liqueur.png|32px]] |
||
|- |
|- |
||
|[[Melon Liqueur|Melon Liqueur (Moderate)]] |
|[[Melon Liqueur|Melon Liqueur (Moderate)]] |
||
| − | |{{Bar| |
+ | |{{Bar|price|12}} |
|[[File:Melon Liqueur.png|32px]] |
|[[File:Melon Liqueur.png|32px]] |
||
|- |
|- |
||
|[[Melon Liqueur|Melon Liqueur (Strong)]] |
|[[Melon Liqueur|Melon Liqueur (Strong)]] |
||
| − | |{{Bar| |
+ | |{{Bar|price|15}} |
|[[File:Melon Liqueur.png|32px]] |
|[[File:Melon Liqueur.png|32px]] |
||
|- |
|- |
||
| − | |[[ |
+ | |[[Milk]] |
| − | |{{Bar| |
+ | |{{Bar|price|6}} |
| − | |[[File: |
+ | |[[File:Milk.gif|32px]] |
|- |
|- |
||
| − | |[[ |
+ | |[[Orange Juice]] |
| − | |{{Bar| |
+ | |{{Bar|price|8}} |
| − | |[[File: |
+ | |[[File:OrangeJuice.gif|32px]] |
|- |
|- |
||
|[[Orc Draught|Orc Draught (Light)]] |
|[[Orc Draught|Orc Draught (Light)]] |
||
| − | |{{Bar| |
+ | |{{Bar|price|12}} |
|[[File:Orc Draught.png|32px]] |
|[[File:Orc Draught.png|32px]] |
||
|- |
|- |
||
|[[Orc Draught|Orc Draught (Moderate)]] |
|[[Orc Draught|Orc Draught (Moderate)]] |
||
| − | |{{Bar| |
+ | |{{Bar|price|16}} |
|[[File:Orc Draught.png|32px]] |
|[[File:Orc Draught.png|32px]] |
||
|- |
|- |
||
|[[Orc Draught|Orc Draught (Strong)]] |
|[[Orc Draught|Orc Draught (Strong)]] |
||
| − | |{{Bar| |
+ | |{{Bar|price|20}} |
|[[File:Orc Draught.png|32px]] |
|[[File:Orc Draught.png|32px]] |
||
|- |
|- |
||
|[[Perry|Perry (Light)]] |
|[[Perry|Perry (Light)]] |
||
| − | |{{Bar| |
+ | |{{Bar|price|7.5}} |
|[[File:Perry.png|32px]] |
|[[File:Perry.png|32px]] |
||
|- |
|- |
||
|[[Perry|Perry (Moderate)]] |
|[[Perry|Perry (Moderate)]] |
||
| − | |{{Bar| |
+ | |{{Bar|price|10}} |
|[[File:Perry.png|32px]] |
|[[File:Perry.png|32px]] |
||
|- |
|- |
||
|[[Perry|Perry (Strong)]] |
|[[Perry|Perry (Strong)]] |
||
| − | |{{Bar| |
+ | |{{Bar|price|12.5}} |
|[[File:Perry.png|32px]] |
|[[File:Perry.png|32px]] |
||
|- |
|- |
||
| + | |[[Pomegranate Juice]] |
||
| − | |[[Red Wine|Red Wine (Light)]] |
||
| − | |{{Bar| |
+ | |{{Bar|price|12}} |
| + | |[[File:Pomegranate Juice.gif|32px]] |
||
| + | |- |
||
| + | |[[Pomegranate Wine|Pomegranate Wine (Light)]] |
||
| + | |{{Bar|price|9}} |
||
| + | |[[File:Pomegranate Wine.gif|32px]] |
||
| + | |- |
||
| + | |[[Pomegranate Wine|Pomegranate Wine (Moderate)]] |
||
| + | |{{Bar|price|12}} |
||
| + | |[[File:Pomegranate Wine.gif|32px]] |
||
| + | |- |
||
| + | |[[Pomegranate Wine|Pomegranate Wine (Strong)]] |
||
| + | |{{Bar|price|15}} |
||
| + | |[[File:Pomegranate Wine.gif|32px]] |
||
| + | |- |
||
| + | |[[Grape Juice|Red Grape Juice]] |
||
| + | |{{Bar|price|12}} |
||
| + | |[[File:RedGrapeJuice.gif|32px]] |
||
| + | |- |
||
| + | |[[Wine|Red Wine (Light)]] |
||
| + | |{{Bar|price|9}} |
||
|[[File:Red Wine.png|32px]] |
|[[File:Red Wine.png|32px]] |
||
|- |
|- |
||
| − | |[[ |
+ | |[[Wine|Red Wine (Moderate)]] |
| − | |{{Bar| |
+ | |{{Bar|price|12}} |
|[[File:Red Wine.png|32px]] |
|[[File:Red Wine.png|32px]] |
||
|- |
|- |
||
| − | |[[ |
+ | |[[Wine|Red Wine (Strong)]] |
| − | |{{Bar| |
+ | |{{Bar|price|15}} |
|[[File:Red Wine.png|32px]] |
|[[File:Red Wine.png|32px]] |
||
|- |
|- |
||
|[[Rum|Rum (Light)]] |
|[[Rum|Rum (Light)]] |
||
| − | |{{Bar| |
+ | |{{Bar|price|9}} |
|[[File:Rum.png|32px]] |
|[[File:Rum.png|32px]] |
||
|- |
|- |
||
|[[Rum|Rum (Moderate)]] |
|[[Rum|Rum (Moderate)]] |
||
| − | |{{Bar| |
+ | |{{Bar|price|12}} |
|[[File:Rum.png|32px]] |
|[[File:Rum.png|32px]] |
||
|- |
|- |
||
|[[Rum|Rum (Strong)]] |
|[[Rum|Rum (Strong)]] |
||
| − | |{{Bar| |
+ | |{{Bar|price|15}} |
|[[File:Rum.png|32px]] |
|[[File:Rum.png|32px]] |
||
|- |
|- |
||
|[[Vodka|Vodka (Light)]] |
|[[Vodka|Vodka (Light)]] |
||
| − | |{{Bar| |
+ | |{{Bar|price|9}} |
|[[File:Vodka.png|32px]] |
|[[File:Vodka.png|32px]] |
||
|- |
|- |
||
|[[Vodka|Vodka (Moderate)]] |
|[[Vodka|Vodka (Moderate)]] |
||
| − | |{{Bar| |
+ | |{{Bar|price|12}} |
|[[File:Vodka.png|32px]] |
|[[File:Vodka.png|32px]] |
||
|- |
|- |
||
|[[Vodka|Vodka (Strong)]] |
|[[Vodka|Vodka (Strong)]] |
||
| − | |{{Bar| |
+ | |{{Bar|price|15}} |
|[[File:Vodka.png|32px]] |
|[[File:Vodka.png|32px]] |
||
| + | |- |
||
| + | |[[Grape Juice|White Grape Juice]] |
||
| + | |{{Bar|price|12}} |
||
| + | |[[File:GrapeJuice.gif|32px]] |
||
| + | |- |
||
| + | |[[Wine|White Wine (Light)]] |
||
| + | |{{Bar|price|9}} |
||
| + | |[[File:White Wine.png|32px]] |
||
| + | |- |
||
| + | |[[Wine|White Wine (Moderate)]] |
||
| + | |{{Bar|price|12}} |
||
| + | |[[File:White Wine.png|32px]] |
||
| + | |- |
||
| + | |[[Wine|White Wine (Strong)]] |
||
| + | |{{Bar|price|15}} |
||
| + | |[[File:White Wine.png|32px]] |
||
|} |
|} |
||
=== Items Bought === |
=== Items Bought === |
||
| − | Below is a table of values for each item that the player can sell to this NPC. Use this table to earn more money by only selling when the prices are high. Please note that the values in the below tables are of the average prices in |
+ | Below is a table of values for each item that the player can sell to this NPC. Use this table to earn more money by only selling when the prices are high. Please note that the values in the below tables are of the average prices in silver coins only and players may encounter NPC’s with better or worse deals. You will not be able to sell every item to every trader as they will not want to purchase every item listed below. |
{| class="article-table mw-collapsible mw-collapsed" border="0" cellpadding="1" cellspacing="1" style="width: 500px;" |
{| class="article-table mw-collapsible mw-collapsed" border="0" cellpadding="1" cellspacing="1" style="width: 500px;" |
||
| Line 309: | Line 435: | ||
|- |
|- |
||
|2 x [[Potato]] |
|2 x [[Potato]] |
||
| − | |{{Bar| |
+ | |{{Bar|price|1}} |
|[[File:Potato.png|32px]] |
|[[File:Potato.png|32px]] |
||
|- |
|- |
||
| − | |2 x Sugar |
+ | |2 x {{VanillaLink|Sugar_Canes|Sugar Canes}} |
| − | |{{Bar| |
+ | |{{Bar|price|1}} |
|[[File:Sugarcane.png|32px]] |
|[[File:Sugarcane.png|32px]] |
||
|- |
|- |
||
| − | |3 x Melon |
+ | |3 x [[Melon]] |
| − | |{{Bar| |
+ | |{{Bar|price|1}} |
|[[File:Melon.png|32px]] |
|[[File:Melon.png|32px]] |
||
|- |
|- |
||
| − | | |
+ | |2 x [[Wheat]] |
| − | |{{Bar| |
+ | |{{Bar|price|1}} |
|[[File:Wheat.png|32px]] |
|[[File:Wheat.png|32px]] |
||
|- |
|- |
||
| − | |[[ |
+ | |[[Apple]] |
| − | |{{Bar| |
+ | |{{Bar|price|2}} |
|[[File:Apples.gif|32px]] |
|[[File:Apples.gif|32px]] |
||
|- |
|- |
||
|[[Banana]] |
|[[Banana]] |
||
| − | |{{Bar| |
+ | |{{Bar|price|2}} |
|[[File:Banana.png|32px]] |
|[[File:Banana.png|32px]] |
||
|- |
|- |
||
|[[Bucket]] |
|[[Bucket]] |
||
| − | |{{Bar| |
+ | |{{Bar|price|3}} |
|[[File:Bucket.png|32px]] |
|[[File:Bucket.png|32px]] |
||
|- |
|- |
||
|[[Cherry]] |
|[[Cherry]] |
||
| − | |{{Bar| |
+ | |{{Bar|price|1}} |
|[[File:Cherry.png|32px]] |
|[[File:Cherry.png|32px]] |
||
|- |
|- |
||
|[[Mug|Clay Mug]] |
|[[Mug|Clay Mug]] |
||
| − | |{{Bar| |
+ | |{{Bar|price|2}} |
|[[File:ClayMug.png|32px]] |
|[[File:ClayMug.png|32px]] |
||
|- |
|- |
||
|[[Date]] |
|[[Date]] |
||
| − | |{{Bar| |
+ | |{{Bar|price|2}} |
|[[File:Date.png|32px]] |
|[[File:Date.png|32px]] |
||
|- |
|- |
||
| − | |Bucket of |
+ | |[[Milk|Bucket of Milk]] |
| − | |{{Bar| |
+ | |{{Bar|price|4}} |
|[[File:MilkBucket.png|32px]] |
|[[File:MilkBucket.png|32px]] |
||
|- |
|- |
||
| − | |[[Mug]] |
+ | |[[Mug|Wooden Mug]] |
| − | |{{Bar| |
+ | |{{Bar|price|1}} |
|[[File:Mug.png|32px]] |
|[[File:Mug.png|32px]] |
||
|- |
|- |
||
|[[Pear]] |
|[[Pear]] |
||
| − | |{{Bar| |
+ | |{{Bar|price|2}} |
|[[File:Pear.png|32px]] |
|[[File:Pear.png|32px]] |
||
|- |
|- |
||
| − | |Water Bucket |
+ | |[[Water|Water Bucket]] |
| − | |{{Bar| |
+ | |{{Bar|price|4}} |
|[[File:WaterBucket.png|32px]] |
|[[File:WaterBucket.png|32px]] |
||
| + | |- |
||
| + | |[[Mug|Ceramic Mug]] |
||
| + | |{{Bar|price|3}} |
||
| + | |[[File:CeramicMug.png|32px]] |
||
| + | |- |
||
| + | |[[Goblet|Wooden Cup]] |
||
| + | |{{Bar|price|1}} |
||
| + | |[[File:GobletWood.png|32px]] |
||
| + | |- |
||
| + | |[[Goblet|Copper Goblet]] |
||
| + | |{{Bar|price|3}} |
||
| + | |[[File:GobletCopper.png|32px]] |
||
| + | |- |
||
| + | |[[Goblet|Silver Goblet]] |
||
| + | |{{Bar|price|10}} |
||
| + | |[[File:GobletSilver.png|32px]] |
||
| + | |- |
||
| + | |[[Goblet|Golden Goblet]] |
||
| + | |{{Bar|price|15}} |
||
| + | |[[File:GobletGold.png|32px]] |
||
| + | |- |
||
| + | |[[Mango]] |
||
| + | |{{Bar|price|1}} |
||
| + | |[[File:Mango.png|32px]] |
||
| + | |- |
||
| + | |[[Lemon]] |
||
| + | |{{Bar|price|2}} |
||
| + | |[[File:Lemon.png|32px]] |
||
| + | |- |
||
| + | |[[Orange]] |
||
| + | |{{Bar|price|2}} |
||
| + | |[[File:Orange.png|32px]] |
||
| + | |- |
||
| + | |[[Lime]] |
||
| + | |{{Bar|price|2}} |
||
| + | |[[File:Lime.png|32px]] |
||
| + | |- |
||
| + | |[[Pomegranate]] |
||
| + | |{{Bar|price|2}} |
||
| + | |[[File:Pomegranate.png|32px]] |
||
| + | |- |
||
| + | |[[Diamond]] |
||
| + | |{{Bar|price|25}} |
||
| + | |[[File:Diamond.png|32px]] |
||
| + | |- |
||
| + | |[[Sapphire]] |
||
| + | |{{Bar|price|12}} |
||
| + | |[[File:Sapphire.png|32px]] |
||
| + | |- |
||
| + | |[[Ruby]] |
||
| + | |{{Bar|price|12}} |
||
| + | |[[File:Ruby.png|32px]] |
||
| + | |- |
||
| + | |[[Pearl]] |
||
| + | |{{Bar|price|25}} |
||
| + | |[[File:Pearl.png|32px]] |
||
|} |
|} |
||
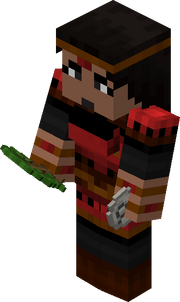
| − | == |
+ | == Southron Food Trader == |
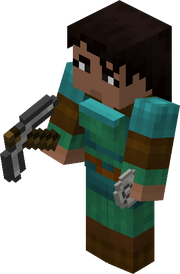
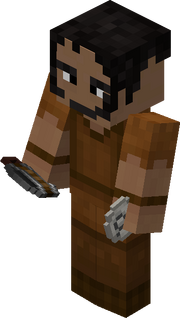
[[File:NearHaradFoodTrader.png|thumb]] |
[[File:NearHaradFoodTrader.png|thumb]] |
||
=== Items Sold === |
=== Items Sold === |
||
| − | Below is a table of values for each item that the player is available to purchase from this NPC. Use this table to find out if your |
+ | Below is a table of values for each item that the player is available to purchase from this NPC. Use this table to find out if your trader is giving you a good deal or not. Please note that the values in the below tables are of the average prices in silver coins only and players may encounter NPC’s with better or worse deals. Each trader will not have every item listed for sale. |
| − | |||
| − | (Note: Table values are general guides only. Some traders many have outlying prices) |
||
{| class="article-table mw-collapsible mw-collapsed" border="0" cellpadding="1" cellspacing="1" style="width: 500px;" |
{| class="article-table mw-collapsible mw-collapsed" border="0" cellpadding="1" cellspacing="1" style="width: 500px;" |
||
| Line 379: | Line 559: | ||
! scope="col" |Image |
! scope="col" |Image |
||
|- |
|- |
||
| − | |2 x Baked Potato |
+ | |2 x [[Potato|Baked Potato]] |
| − | |{{Bar| |
+ | |{{Bar|price|7}} |
|[[File:PotatoBaked.png|32px]] |
|[[File:PotatoBaked.png|32px]] |
||
|- |
|- |
||
| − | |[[ |
+ | |[[Apple]] |
| − | |{{Bar| |
+ | |{{Bar|price|3}} |
|[[File:Apples.gif|32px]] |
|[[File:Apples.gif|32px]] |
||
|- |
|- |
||
|[[Banana]] |
|[[Banana]] |
||
| − | |{{Bar| |
+ | |{{Bar|price|10}} |
|[[File:Banana.png|32px]] |
|[[File:Banana.png|32px]] |
||
|- |
|- |
||
|[[Bread]] |
|[[Bread]] |
||
| − | |{{Bar| |
+ | |{{Bar|price|5}} |
| − | |[[File: |
+ | |[[File:Bread.png|32px]] |
| + | |- |
||
| + | |[[Olive Bread]] |
||
| + | |{{Bar|price|6}} |
||
| + | |[[File:Olive Bread.png|32px]] |
||
|- |
|- |
||
|[[Cherry]] |
|[[Cherry]] |
||
| − | |{{Bar| |
+ | |{{Bar|price|2}} |
|[[File:Cherry.png|32px]] |
|[[File:Cherry.png|32px]] |
||
|- |
|- |
||
| − | |Cooked Chicken |
+ | |{{VanillaLink|Cooked_Chicken|Cooked Chicken}} |
| − | |{{Bar| |
+ | |{{Bar|price|6}} |
|[[File:ChickenCooked.png|32px]] |
|[[File:ChickenCooked.png|32px]] |
||
|- |
|- |
||
| − | |Cooked Fish |
+ | |{{VanillaLink|Fish_(food)|Cooked Fish}} |
| − | |{{Bar| |
+ | |{{Bar|price|6}} |
|[[File:FishCooked.png|32px]] |
|[[File:FishCooked.png|32px]] |
||
|- |
|- |
||
| − | |Cooked Porkchop |
+ | |{{VanillaLink|Cooked_Porkchop|Cooked Porkchop}} |
| − | |{{Bar| |
+ | |{{Bar|price|7}} |
|[[File:PorkchopCooked.png|32px]] |
|[[File:PorkchopCooked.png|32px]] |
||
|- |
|- |
||
|[[Rabbit Meat|Cooked Rabbit]] |
|[[Rabbit Meat|Cooked Rabbit]] |
||
| − | |{{Bar| |
+ | |{{Bar|price|6}} |
|[[File:CookedRabbit.png|32px]] |
|[[File:CookedRabbit.png|32px]] |
||
| + | |- |
||
| + | |[[Mutton|Cooked Mutton]] |
||
| + | |{{Bar|price|7}} |
||
| + | |[[File:CookedMutton.png|32px]] |
||
| + | |- |
||
| + | |[[Venison|Cooked Venison]] |
||
| + | |{{Bar|price|7}} |
||
| + | |[[File:CookedVenison.png|32px]] |
||
| + | |- |
||
| + | |[[Camel Meat|Cooked Camel]] |
||
| + | |{{Bar|price|6}} |
||
| + | |[[File:CamelCooked.png|32px]] |
||
|- |
|- |
||
|[[Date]] |
|[[Date]] |
||
| − | |{{Bar| |
+ | |{{Bar|price|2}} |
|[[File:Date.png|32px]] |
|[[File:Date.png|32px]] |
||
|- |
|- |
||
|[[Gammon]] |
|[[Gammon]] |
||
| − | |{{Bar| |
+ | |{{Bar|price|7}} |
|[[File:Gammon.png|32px]] |
|[[File:Gammon.png|32px]] |
||
|- |
|- |
||
|[[Kebab]] |
|[[Kebab]] |
||
| − | |{{Bar| |
+ | |{{Bar|price|8}} |
|[[File:Kebab.png|32px]] |
|[[File:Kebab.png|32px]] |
||
|- |
|- |
||
|[[Mango]] |
|[[Mango]] |
||
| − | |{{Bar| |
+ | |{{Bar|price|10}} |
|[[File:Mango.png|32px]] |
|[[File:Mango.png|32px]] |
||
|- |
|- |
||
| − | |Melon |
+ | |[[Melon]] |
| − | |{{Bar| |
+ | |{{Bar|price|8}} |
|[[File:Melon.png|32px]] |
|[[File:Melon.png|32px]] |
||
|- |
|- |
||
|[[Pear]] |
|[[Pear]] |
||
| − | |{{Bar| |
+ | |{{Bar|price|3}} |
|[[File:Pear.png|32px]] |
|[[File:Pear.png|32px]] |
||
| + | |- |
||
| + | |[[Lemon]] |
||
| + | |{{Bar|price|3}} |
||
| + | |[[File:Lemon.png|32px]] |
||
| + | |- |
||
| + | |[[Orange]] |
||
| + | |{{Bar|price|3}} |
||
| + | |[[File:Orange.png|32px]] |
||
| + | |- |
||
| + | |[[Lime]] |
||
| + | |{{Bar|price|3}} |
||
| + | |[[File:Lime.png|32px]] |
||
| + | |- |
||
| + | |[[Plum]] |
||
| + | |{{Bar|price|3}} |
||
| + | |[[File:Plum.png|32px]] |
||
| + | |- |
||
| + | |[[Olives]] |
||
| + | |{{Bar|price|2}} |
||
| + | |[[File:Olives.png|32px]] |
||
| + | |- |
||
| + | |[[Almond]] |
||
| + | |{{Bar|price|2}} |
||
| + | |[[File:Almond.png|32px]] |
||
| + | |- |
||
| + | |[[Marchpane]] |
||
| + | |{{Bar|price|6}} |
||
| + | |[[File:Marchpane.png|32px]] |
||
| + | |- |
||
| + | |[[Marchpane|Chocolate Marchpane]] |
||
| + | |{{Bar|price|10}} |
||
| + | |[[File:MarchpaneChocolate.png|32px]] |
||
| + | |- |
||
| + | |[[Melon Soup]] |
||
| + | |{{Bar|price|12}} |
||
| + | |[[File:Melon Soup.png|32px]] |
||
|- |
|- |
||
|[[Kebab|Shish Kebab]] |
|[[Kebab|Shish Kebab]] |
||
| − | |{{Bar| |
+ | |{{Bar|price|8}} |
|[[File:ShishKebab.png|32px]] |
|[[File:ShishKebab.png|32px]] |
||
|- |
|- |
||
| − | |Steak |
+ | |{{VanillaLink|Steak}} |
| − | |{{Bar| |
+ | |{{Bar|price|7}} |
|[[File:Steak.png|32px]] |
|[[File:Steak.png|32px]] |
||
|} |
|} |
||
| Line 450: | Line 682: | ||
=== Items Bought === |
=== Items Bought === |
||
| − | Below is a table of values for each item that the player can sell to this NPC. Use this table to earn more money by only selling when the prices are high. Please note that the values in the below tables are of the average prices in |
+ | Below is a table of values for each item that the player can sell to this NPC. Use this table to earn more money by only selling when the prices are high. Please note that the values in the below tables are of the average prices in silver coins only and players may encounter NPC’s with better or worse deals. You will not be able to sell every item to every trader as they will not want to purchase every item listed below. |
{| class="article-table mw-collapsible mw-collapsed" border="0" cellpadding="1" cellspacing="1" style="width: 500px;" |
{| class="article-table mw-collapsible mw-collapsed" border="0" cellpadding="1" cellspacing="1" style="width: 500px;" |
||
| Line 459: | Line 691: | ||
|- |
|- |
||
|2 x [[Potato]] |
|2 x [[Potato]] |
||
| − | |{{Bar| |
+ | |{{Bar|price|1}} |
|[[File:Potato.png|32px]] |
|[[File:Potato.png|32px]] |
||
|- |
|- |
||
| − | |6 x Bone Meal |
+ | |6 x [[Bone Meal]] |
| − | |{{Bar| |
+ | |{{Bar|price|1}} |
|[[File:BoneMeal.png|32px]] |
|[[File:BoneMeal.png|32px]] |
||
|- |
|- |
||
| − | |Bucket |
+ | |[[Bucket]] |
| − | |{{Bar| |
+ | |{{Bar|price|3}} |
|[[File:Bucket.png|32px]] |
|[[File:Bucket.png|32px]] |
||
|- |
|- |
||
|[[Plate|Clay Plate]] |
|[[Plate|Clay Plate]] |
||
| − | |{{Bar| |
+ | |{{Bar|price|1}} |
|[[File:ClayPlate.png|32px]] |
|[[File:ClayPlate.png|32px]] |
||
|- |
|- |
||
| − | |Raw Beef |
+ | |{{VanillaLink|Raw_Beef|Raw Beef}} |
| − | |{{Bar| |
+ | |{{Bar|price|3}} |
|[[File:RawBeef.png|32px]] |
|[[File:RawBeef.png|32px]] |
||
|- |
|- |
||
| − | |Raw Chicken |
+ | |{{VanillaLink|Raw_Chicken|Raw Chicken}} |
| − | |{{Bar| |
+ | |{{Bar|price|3}} |
|[[File:ChickenRaw.png|32px]] |
|[[File:ChickenRaw.png|32px]] |
||
|- |
|- |
||
| − | |Raw Fish |
+ | |{{VanillaLink|Fish_(food)|Raw Fish}} |
| − | |{{Bar| |
+ | |{{Bar|price|2}} |
|[[File:Fish.png|32px]] |
|[[File:Fish.png|32px]] |
||
|- |
|- |
||
| − | |Raw Porkchop |
+ | |{{VanillaLink|Raw_Porkchop|Raw Porkchop}} |
| − | |{{Bar| |
+ | |{{Bar|price|3}} |
|[[File:RawPorkchop.png|32px]] |
|[[File:RawPorkchop.png|32px]] |
||
|- |
|- |
||
|[[Rabbit Meat|Raw Rabbit]] |
|[[Rabbit Meat|Raw Rabbit]] |
||
| − | |{{Bar| |
+ | |{{Bar|price|3}} |
|[[File:RawRabbit.png|32px]] |
|[[File:RawRabbit.png|32px]] |
||
|- |
|- |
||
| + | |[[Mutton|Raw Mutton]] |
||
| − | |Water Bucket |
||
| − | |{{Bar| |
+ | |{{Bar|price|3}} |
| + | |[[File:Mutton.png|32px]] |
||
| + | |- |
||
| + | |[[Venison|Raw Venison]] |
||
| + | |{{Bar|price|3}} |
||
| + | |[[File:Venison.png|32px]] |
||
| + | |- |
||
| + | |[[Water|Water Bucket]] |
||
| + | |{{Bar|price|4}} |
||
|[[File:WaterBucket.png|32px]] |
|[[File:WaterBucket.png|32px]] |
||
| + | |- |
||
| + | |[[Salt]] |
||
| + | |{{Bar|price|10}} |
||
| + | |[[File:Salt.png|32px]] |
||
| + | |- |
||
| + | |[[Diamond]] |
||
| + | |{{Bar|price|25}} |
||
| + | |[[File:Diamond.png|32px]] |
||
| + | |- |
||
| + | |[[Ruby]] |
||
| + | |{{Bar|price|12}} |
||
| + | |[[File:Ruby.png|32px]] |
||
| + | |- |
||
| + | |[[Topaz]] |
||
| + | |{{Bar|price|8}} |
||
| + | |[[File:Topaz.png|32px]] |
||
|} |
|} |
||
| − | == |
+ | == Southron Plant Trader == |
[[File:NearHaradPlantTrader.png|thumb]] |
[[File:NearHaradPlantTrader.png|thumb]] |
||
=== Items Sold === |
=== Items Sold === |
||
| − | Below is a table of values for each item that the player is available to purchase from this NPC. Use this table to find out if your |
+ | Below is a table of values for each item that the player is available to purchase from this NPC. Use this table to find out if your trader is giving you a good deal or not. Please note that the values in the below tables are of the average prices in silver coins only and players may encounter NPC’s with better or worse deals. Each trader will not have every item listed for sale. |
| − | |||
| − | (Note: Table values are general guides only. Some traders many have outlying prices) |
||
{| class="article-table mw-collapsible mw-collapsed" border="0" cellpadding="1" cellspacing="1" style="width: 500px;" |
{| class="article-table mw-collapsible mw-collapsed" border="0" cellpadding="1" cellspacing="1" style="width: 500px;" |
||
| Line 513: | Line 767: | ||
! scope="col" |Image |
! scope="col" |Image |
||
|- |
|- |
||
| − | |Oak Sapling |
+ | |{{VanillaLink|Sapling|Oak Sapling}} |
| − | |{{Bar| |
+ | |{{Bar|price|3}} |
|[[File:OakSapling.png|32px]] |
|[[File:OakSapling.png|32px]] |
||
|- |
|- |
||
| − | |Spruce Sapling |
+ | |{{VanillaLink|Sapling|Spruce Sapling}} |
| − | |{{Bar| |
+ | |{{Bar|price|3}} |
|[[File:SpruceSapling.png|32px]] |
|[[File:SpruceSapling.png|32px]] |
||
|- |
|- |
||
| − | |Birch Sapling |
+ | |{{VanillaLink|Sapling|Birch Sapling}} |
| − | |{{Bar| |
+ | |{{Bar|price|3}} |
|[[File:Birch_Sapling.png|32px]] |
|[[File:Birch_Sapling.png|32px]] |
||
|- |
|- |
||
| − | |Jungle Sapling |
+ | |{{VanillaLink|Sapling|Jungle Sapling}} |
| − | |{{Bar| |
+ | |{{Bar|price|8}} |
|[[File:JungleSapling.png|32px]] |
|[[File:JungleSapling.png|32px]] |
||
|- |
|- |
||
| − | |[[Shire Pine |
+ | |[[Shire Pine|Shire Pine Sapling]] |
| − | |{{Bar| |
+ | |{{Bar|price|8}} |
|[[File:Shire_Pine_Sapling.png|32px]] |
|[[File:Shire_Pine_Sapling.png|32px]] |
||
|- |
|- |
||
| − | |[[Mirk-oak Tree|Mirk |
+ | |[[Mirk-oak Tree|Mirk-oak Sapling]] |
| − | |{{Bar| |
+ | |{{Bar|price|8}} |
|[[File:MirkoakSapling.png|32px]] |
|[[File:MirkoakSapling.png|32px]] |
||
|- |
|- |
||
| − | |[[Fruit Trees|Apple |
+ | |[[Fruit Trees|Apple Sapling]] |
| − | |{{Bar| |
+ | |{{Bar|price|10}} |
|[[File:AppleSapling.png|32px]] |
|[[File:AppleSapling.png|32px]] |
||
|- |
|- |
||
| − | |[[Fruit Trees|Pear |
+ | |[[Fruit Trees|Pear Sapling]] |
| − | |{{Bar| |
+ | |{{Bar|price|10}} |
|[[File:PearSapling.png|32px]] |
|[[File:PearSapling.png|32px]] |
||
|- |
|- |
||
| − | |[[Fruit Trees|Cherry |
+ | |[[Fruit Trees|Cherry Sapling]] |
| − | |{{Bar| |
+ | |{{Bar|price|20}} |
|[[File:CherrySapling.png|32px]] |
|[[File:CherrySapling.png|32px]] |
||
|- |
|- |
||
| − | |[[Beech Tree |
+ | |[[Beech Tree|Beech Sapling]] |
| − | |{{Bar| |
+ | |{{Bar|price|3}} |
|[[File:Beech_Sapling.png|32px]] |
|[[File:Beech_Sapling.png|32px]] |
||
|- |
|- |
||
| − | |[[Fruit Trees|Mango |
+ | |[[Fruit Trees|Mango Sapling]] |
| − | |{{Bar| |
+ | |{{Bar|price|30}} |
|[[File:MangoSapling.png|32px]] |
|[[File:MangoSapling.png|32px]] |
||
|- |
|- |
||
| − | |[[Fruit Trees|Banana |
+ | |[[Fruit Trees|Banana Sapling]] |
| − | |{{Bar| |
+ | |{{Bar|price|30}} |
|[[File:BananaSapling.png|32px]] |
|[[File:BananaSapling.png|32px]] |
||
|- |
|- |
||
| − | |[[Maple Tree |
+ | |[[Maple Tree|Maple Sapling]] |
| − | |{{Bar| |
+ | |{{Bar|price|3}} |
|[[File:MapleSapling.png|32px]] |
|[[File:MapleSapling.png|32px]] |
||
|- |
|- |
||
| − | |[[Larch Tree |
+ | |[[Larch Tree|Larch Sapling]] |
| − | |{{Bar| |
+ | |{{Bar|price|3}} |
|[[File:LarchSapling.png|32px]] |
|[[File:LarchSapling.png|32px]] |
||
|- |
|- |
||
| − | |[[Fruit Trees|Date Palm |
+ | |[[Fruit Trees|Date Palm Sapling]] |
| − | |{{Bar| |
+ | |{{Bar|price|3}} |
|[[File:SaplingDatePalm.png|32px]] |
|[[File:SaplingDatePalm.png|32px]] |
||
|- |
|- |
||
| + | |[[Fruit Trees|Lemon Sapling]] |
||
| − | |Poppy |
||
| − | |{{Bar| |
+ | |{{Bar|price|10}} |
| + | |[[File:LemonSapling.png|32px]] |
||
| + | |- |
||
| + | |[[Fruit Trees|Orange Sapling]] |
||
| + | |{{Bar|price|10}} |
||
| + | |[[File:OrangeSapling.png|32px]] |
||
| + | |- |
||
| + | |[[Fruit Trees|Lime Sapling]] |
||
| + | |{{Bar|price|10}} |
||
| + | |[[File:LimeSapling.png|32px]] |
||
| + | |- |
||
| + | |[[Fruit Trees|Olive Sapling]] |
||
| + | |{{Bar|price|10}} |
||
| + | |[[File:OliveSapling.png|32px]] |
||
| + | |- |
||
| + | |[[Fruit Trees|Almond Sapling]] |
||
| + | |{{Bar|price|10}} |
||
| + | |[[File:AlmondSapling.png|32px]] |
||
| + | |- |
||
| + | |{{VanillaLink|Flower|Poppy}} |
||
| + | |{{Bar|price|1}} |
||
|[[File:Poppy.png|32px]] |
|[[File:Poppy.png|32px]] |
||
|- |
|- |
||
| − | |Dandelion |
+ | |{{VanillaLink|Flower|Dandelion}} |
| − | |{{Bar| |
+ | |{{Bar|price|1}} |
|[[File:Dandelion.png|32px]] |
|[[File:Dandelion.png|32px]] |
||
|- |
|- |
||
| − | |Red Mushroom |
+ | |{{VanillaLink|Mushroom|Red Mushroom}} |
| + | |{{Bar|price|3}} |
||
| − | |2 - 4}} |
||
|[[File:MushroomRed.png|32px]] |
|[[File:MushroomRed.png|32px]] |
||
|- |
|- |
||
| − | |Brown Mushroom |
+ | |{{VanillaLink|Mushroom|Brown Mushroom}} |
| − | |{{Bar| |
+ | |{{Bar|price|3}} |
|[[File:MushroomBrown.png|32px]] |
|[[File:MushroomBrown.png|32px]] |
||
|- |
|- |
||
|[[Morgul-shroom]] |
|[[Morgul-shroom]] |
||
| − | |{{Bar| |
+ | |{{Bar|price|20}} |
| − | |[[File: |
+ | |[[File:Morgul-shroom.png|32px]] |
|- |
|- |
||
| − | |[[Red Sand Gem]] |
+ | |[[Sand Gem|Red Sand Gem]] |
| − | |{{Bar| |
+ | |{{Bar|price|3}} |
|[[File:RedSandGem.png|32px]] |
|[[File:RedSandGem.png|32px]] |
||
|- |
|- |
||
| − | |[[Yellow Sand Gem]] |
+ | |[[Sand Gem|Yellow Sand Gem]] |
| − | |{{Bar| |
+ | |{{Bar|price|3}} |
|[[File:YellowSandGem.png|32px]] |
|[[File:YellowSandGem.png|32px]] |
||
|- |
|- |
||
|[[Harad Daisy]] |
|[[Harad Daisy]] |
||
| − | |{{Bar| |
+ | |{{Bar|price|3}} |
|[[File:HaradFlower_daisy.png|32px]] |
|[[File:HaradFlower_daisy.png|32px]] |
||
|- |
|- |
||
| − | |[[ |
+ | |[[Southbell]] |
| − | |{{Bar| |
+ | |{{Bar|price|3}} |
|[[File:HaradFlower_pink.png|32px]] |
|[[File:HaradFlower_pink.png|32px]] |
||
|} |
|} |
||
| Line 612: | Line 886: | ||
=== Items Bought === |
=== Items Bought === |
||
| − | Below is a table of values for each item that the player can sell to this NPC. Use this table to earn more money by only selling when the prices are high. Please note that the values in the below tables are of the average prices in |
+ | Below is a table of values for each item that the player can sell to this NPC. Use this table to earn more money by only selling when the prices are high. Please note that the values in the below tables are of the average prices in silver coins only and players may encounter NPC’s with better or worse deals. You will not be able to sell every item to every trader as they will not want to purchase every item listed below. |
{| class="article-table mw-collapsible mw-collapsed" border="0" cellpadding="1" cellspacing="1" style="width: 500px;" |
{| class="article-table mw-collapsible mw-collapsed" border="0" cellpadding="1" cellspacing="1" style="width: 500px;" |
||
| Line 620: | Line 894: | ||
! scope="col" |Image |
! scope="col" |Image |
||
|- |
|- |
||
| − | |Bucket |
+ | |[[Bucket]] |
| − | |{{Bar| |
+ | |{{Bar|price|3}} |
|[[File:Bucket.png|32px]] |
|[[File:Bucket.png|32px]] |
||
|- |
|- |
||
| − | |Water Bucket |
+ | |[[Water|Water Bucket]] |
| − | |{{Bar| |
+ | |{{Bar|price|4}} |
|[[File:WaterBucket.png|32px]] |
|[[File:WaterBucket.png|32px]] |
||
|- |
|- |
||
| − | |Iron Axe |
+ | |{{VanillaLink|Axe|Iron Axe}} |
| − | |{{Bar| |
+ | |{{Bar|price|8}} |
|[[File:AxeIron.png|32px]] |
|[[File:AxeIron.png|32px]] |
||
|- |
|- |
||
| − | |Stone Axe |
+ | |{{VanillaLink|Axe|Stone Axe}} |
| − | |{{Bar| |
+ | |{{Bar|price|1}} |
|[[File:AxeStone.png|32px]] |
|[[File:AxeStone.png|32px]] |
||
|- |
|- |
||
| − | |[[Bronze |
+ | |[[Bronze Equipment|Bronze Axe]] |
| − | |{{Bar| |
+ | |{{Bar|price|6}} |
|[[File:AxeBronze.png|32px]] |
|[[File:AxeBronze.png|32px]] |
||
|- |
|- |
||
| − | |6 x |
+ | |6 x [[Bone Meal]] |
| − | |{{Bar| |
+ | |{{Bar|price|1}} |
|[[File:BoneMeal.png|32px]] |
|[[File:BoneMeal.png|32px]] |
||
| + | |- |
||
| + | |[[Emerald]] |
||
| + | |{{Bar|price|15}} |
||
| + | |[[File:Emerald.png|32px]] |
||
| + | |- |
||
| + | |[[Ruby]] |
||
| + | |{{Bar|price|12}} |
||
| + | |[[File:Ruby.png|32px]] |
||
| + | |- |
||
| + | |[[Amber]] |
||
| + | |{{Bar|price|10}} |
||
| + | |[[File:Amber.png|32px]] |
||
| + | |} |
||
| + | |||
| + | == Southron Blacksmith == |
||
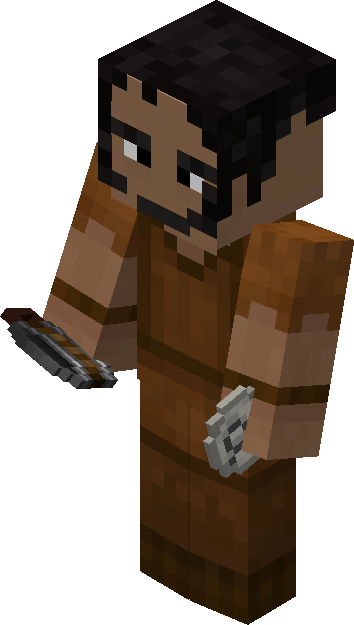
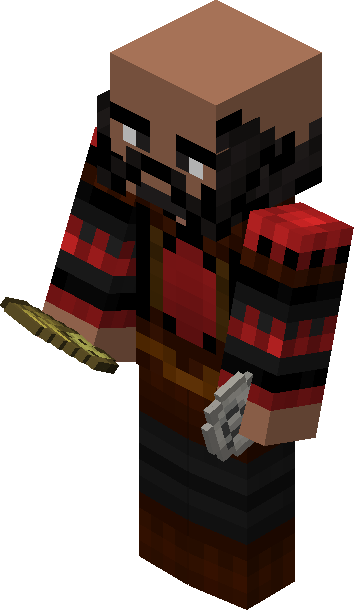
| + | [[File:NearHaradBlacksmith.png|thumb]] |
||
| + | |||
| + | === Items Sold === |
||
| + | |||
| + | Below is a table of values for each item that the player is available to purchase from this NPC. Use this table to find out if your trader is giving you a good deal or not. Please note that the values in the below tables are of the average prices in silver coins only and players may encounter NPC’s with better or worse deals. Each trader will not have every item listed for sale. |
||
| + | |||
| + | {| class="article-table mw-collapsible mw-collapsed" border="0" cellpadding="1" cellspacing="1" style="width: 500px;" |
||
| + | |- |
||
| + | ! scope="col" |Items Sold |
||
| + | ! scope="col" |Price Range |
||
| + | ! scope="col" |Image |
||
| + | |- |
||
| + | |[[Haradric Crafting Table]] |
||
| + | |{{Bar|price|40}} |
||
| + | |[[File:Haradric Crafting Table.png|32px]] |
||
| + | |- |
||
| + | |[[Haradric Equipment|Haradric Scimitar]] |
||
| + | |{{Bar|price|15}} |
||
| + | |[[File:ScimitarNearHarad.png|32px]] |
||
| + | |- |
||
| + | |[[Haradric Equipment|Haradric Dagger]] |
||
| + | |{{Bar|price|9}} |
||
| + | |[[File:DaggerNearHarad.png|32px]] |
||
| + | |- |
||
| + | |[[Haradric Equipment|Poisoned Haradric Dagger]] |
||
| + | |{{Bar|price|15}} |
||
| + | |[[File:DaggerNearHaradPoisoned.png|32px]] |
||
| + | |- |
||
| + | |[[Haradric Equipment|Haradric Spear]] |
||
| + | |{{Bar|price|16}} |
||
| + | |[[File:Haradric Spear.png|32px]] |
||
| + | |- |
||
| + | |[[Haradric Equipment|Haradric Pike]] |
||
| + | |{{Bar|price|16}} |
||
| + | |[[File:PikeNearHarad.png|32px]] |
||
| + | |- |
||
| + | |[[Haradric Equipment|Haradric Poleaxe]] |
||
| + | |{{Bar|price|16}} |
||
| + | |[[File:PoleaxeNearHarad.png|32px]] |
||
| + | |- |
||
| + | |[[Haradric Armour|Haradric Helmet]] |
||
| + | |{{Bar|price|20}} |
||
| + | |[[File:HelmetNearHarad.png|32px]] |
||
| + | |- |
||
| + | |[[Haradric Armour|Haradric Chestplate]] |
||
| + | |{{Bar|price|32}} |
||
| + | |[[File:BodyNearHarad.png|32px]] |
||
| + | |- |
||
| + | |[[Haradric Armour|Haradric Leggings]] |
||
| + | |{{Bar|price|26}} |
||
| + | |[[File:LegsNearHarad.png|32px]] |
||
| + | |- |
||
| + | |[[Haradric Armour|Haradric Boots]] |
||
| + | |{{Bar|price|17}} |
||
| + | |[[File:BootsNearHarad.png|32px]] |
||
| + | |- |
||
| + | |[[Hammer|Blacksmith Hammer]] |
||
| + | |{{Bar|price|18}} |
||
| + | |[[File:BlacksmithHammer.png|32px]] |
||
| + | |- |
||
| + | |8 x [[Bars|Iron Bars]] |
||
| + | |{{Bar|price|20}} |
||
| + | |[[File:Iron Bars.png|32px]] |
||
| + | |- |
||
| + | |8 x [[Bars|Bronze Bars]] |
||
| + | |{{Bar|price|20}} |
||
| + | |[[File:Bronze Bars.png|32px]] |
||
| + | |- |
||
| + | |4 x [[Crossbow Bolt]] |
||
| + | |{{Bar|price|3}} |
||
| + | |[[File:Crossbow Bolt.png|32px]] |
||
| + | |- |
||
| + | |[[Crossbow|Iron Crossbow]] |
||
| + | |{{Bar|price|15}} |
||
| + | |[[File:IronCrossbow.png|32px]] |
||
| + | |- |
||
| + | |[[Crossbow|Bronze Crossbow]] |
||
| + | |{{Bar|price|12}} |
||
| + | |[[File:BronzeCrossbow.png|32px]] |
||
| + | |- |
||
| + | |[[Horse Armour|Near Harad Horse Armour]] |
||
| + | |{{Bar|price|25}} |
||
| + | |[[File:HorseArmorNearHarad.png|32px]] |
||
| + | |} |
||
| + | |||
| + | === Items Bought === |
||
| + | |||
| + | Below is a table of values for each item that the player can sell to this NPC. Use this table to earn more money by only selling when the prices are high. Please note that the values in the below tables are of the average prices in silver coins only and players may encounter NPC’s with better or worse deals. You will not be able to sell every item to every trader as they will not want to purchase every item listed below. |
||
| + | |||
| + | {| class="article-table mw-collapsible mw-collapsed" border="0" cellpadding="1" cellspacing="1" style="width: 500px;" |
||
| + | |- |
||
| + | ! scope="col" |Items Bought |
||
| + | ! scope="col" |Price Range |
||
| + | ! scope="col" |Image |
||
| + | |- |
||
| + | |[[Iron Ingot]] |
||
| + | |{{Bar|price|3}} |
||
| + | |[[File:Iron Ingot.png|32px]] |
||
| + | |- |
||
| + | |2 x [[Coal]] |
||
| + | |{{Bar|price|1}} |
||
| + | |[[File:Coals.gif|32px]] |
||
| + | |- |
||
| + | |[[Gold Ingot]] |
||
| + | |{{Bar|price|15}} |
||
| + | |[[File:Gold Ingot.png|32px]] |
||
| + | |- |
||
| + | |[[Copper Ingot]] |
||
| + | |{{Bar|price|3}} |
||
| + | |[[File:Copper.png|32px]] |
||
| + | |- |
||
| + | |[[Tin Ingot]] |
||
| + | |{{Bar|price|3}} |
||
| + | |[[File:Tin.png|32px]] |
||
| + | |- |
||
| + | |[[Bronze Ingot]] |
||
| + | |{{Bar|price|3}} |
||
| + | |[[File:Bronze Ingot.png|32px]] |
||
| + | |- |
||
| + | |[[Diamond]] |
||
| + | |{{Bar|price|25}} |
||
| + | |[[File:Diamond.png|32px]] |
||
| + | |- |
||
| + | |[[Emerald]] |
||
| + | |{{Bar|price|15}} |
||
| + | |[[File:Emerald.png|32px]] |
||
| + | |- |
||
| + | |[[Ruby]] |
||
| + | |{{Bar|price|12}} |
||
| + | |[[File:Ruby.png|32px]] |
||
| + | |- |
||
| + | |[[Amber]] |
||
| + | |{{Bar|price|10}} |
||
| + | |[[File:Amber.png|32px]] |
||
| + | |- |
||
| + | |[[Leather]] |
||
| + | |{{Bar|price|2}} |
||
| + | |[[File:Leather.png|32px]] |
||
| + | |- |
||
| + | |[[Bottle of Poison]] |
||
| + | |{{Bar|price|10}} |
||
| + | |[[File:Bottle of Poison.png|32px]] |
||
|} |
|} |
||
== Gallery == |
== Gallery == |
||
<gallery> |
<gallery> |
||
| − | HaradMiner.png| |
+ | HaradMiner.png|Southron Mineral Trader |
| − | HaradMinerTrader.png| |
+ | HaradMinerTrader.png|Southron Mineral Trades |
</gallery> |
</gallery> |
||
<gallery> |
<gallery> |
||
| − | HaradFood.png| |
+ | HaradFood.png|Southron Food Trader |
| − | HaradFoodTrader.png| |
+ | HaradFoodTrader.png|Southron Food Trades |
</gallery> |
</gallery> |
||
<gallery> |
<gallery> |
||
| − | HaradDrink.png| |
+ | HaradDrink.png|Southron Drink Trader |
| − | HaradDrinksTrader.png| |
+ | HaradDrinksTrader.png|Southron Drink Trades |
</gallery> |
</gallery> |
||
<gallery> |
<gallery> |
||
| − | HaradPlant.png| |
+ | HaradPlant.png|Southron Plant Trader |
| − | HaradPlantTrader.png| |
+ | HaradPlantTrader.png|Southron Plant Trades |
</gallery> |
</gallery> |
||
| + | <gallery> |
||
| + | HaradBlacksmith.png|Southron Blacksmith |
||
| + | HaradBlacksmithTrades.png|Southron Blacksmith Trades |
||
| + | </gallery> |
||
| + | |||
== Speech Bank == |
== Speech Bank == |
||
| + | ===Southron Blacksmiths=== |
||
| + | <div class="mw-collapsible mw-collapsed"> |
||
| + | '''Friendly''' |
||
| + | *Welcome, my friend! What would you like today? |
||
| + | *I forge the finest arms in all the Southlands! |
||
| + | *Have you tried the bronze corselets, <span class="insertusername">Person</span>? |
||
| + | *I hear the clinking of silver in your pockets! |
||
| + | *Men come from leagues around to buy my scimitars! |
||
| + | *Good day to you, <span class="insertusername">Person</span>! I have much that may interest you! |
||
| + | *I forged a scimitar this morning just for you! |
||
| + | *My scimitars are sharp, my daggers keen, and my corselets polished! |
||
| + | *You need a helmet to keep the sun off your head, my friend. |
||
| + | *Do you have anything to trade, <span class="insertusername">Person</span>? |
||
| + | |||
| + | '''Hostile''' |
||
| + | *No business for you! |
||
| + | *Begone, villain from the North! |
||
| + | *You are an enemy of Harad, <span class="insertusername">Person</span>! |
||
| + | *Be off before I strike you with my burning hammer! |
||
| + | *The only scimitar fit for you would be one embedded in your belly! |
||
| + | *I would not trade with you even if all my coffers lay empty! |
||
| + | *No trade for you, <span class="insertusername">Person</span>! |
||
| + | *Get yourself out of our lands! |
||
| + | *You have the stink of Gondor about you! |
||
| + | |||
| + | '''Neutral''' |
||
| + | *I will not forge arms for a stranger, <span class="insertusername">Person</span>. |
||
| + | *I trade only with the folk of Haradwaith. |
||
| + | *You shall have to go elsewhere for your weapons. |
||
| + | *What are you even doing here, my friend? |
||
| + | *You are not one of our people, my friend. |
||
| + | *I have polished corselets aplenty, but only for the friends of Harad. |
||
| + | *You are a stranger to our lands, <span class="insertusername">Person</span>. |
||
| + | </div> |
||
| + | ===All Other Southron Traders=== |
||
<div class="mw-collapsible mw-collapsed"> |
<div class="mw-collapsible mw-collapsed"> |
||
| − | 'Friendly |
+ | '''Friendly''' |
*Greetings, <span class="insertusername">Person</span>! I hope that you will buy something from my stall. |
*Greetings, <span class="insertusername">Person</span>! I hope that you will buy something from my stall. |
||
*What is it that you wish to buy? For I sell treasures from all over the world! |
*What is it that you wish to buy? For I sell treasures from all over the world! |
||
| Line 699: | Line 1,170: | ||
[[Category:Men]] |
[[Category:Men]] |
||
[[Category:Level 2 Mobs]] |
[[Category:Level 2 Mobs]] |
||
| + | [[Category:Blacksmith]] |
||
Revision as of 23:20, 13 July 2019

|
This page contains content on features that are no longer part of the current version of the mod. |
|
Note: These traders are no longer included in the Mod. They got replaced in Update 34 by
Southron traders are specialized trading NPCs that spawn in bazaars, which can be found in Southron villages. Each bazaar will spawn four different booths, each containing one of the following five traders. It is possible for two (or more) of the same kind of trader to be found in the same bazaar.
- Mineral traders
- The Southron mineral traders are NPC traders that sell mining goods.
- They will buy mining equipment for example: torches and pickaxes.
- Drink traders
- The drink traders sell a variety of beverages.
- They will buy brewing ingredients such as carrots, apples, wheat and sugarcane; as well as objects needed for the brewing process, such as buckets and clay mugs.
- Food traders
- The food traders sell food of all types including cooked meat and fruit.
- They buy raw food and buckets.
- Plant traders
- Southron plant traders sell flowers, crops, mushrooms, and saplings.
- They buy tree-farming equipment such as axes, water and bonemeal, etc.
- Blacksmiths
- Southron blacksmiths sell armour, weapons, and iron and bronze bars.
- They buy coal, ingots, gems, leather, and bottles of poison.
Upon trading with a Southron mineral, drink, food, or plant trader, the player earns the achievement "Desert Riches"; while the achievement "Bronzen Corselets" is earned by trading with a Southron blacksmith.
More detailed information about what items each trader buys and sells can be found below.
Southron Mineral Trader

Items Sold
Below is a table of values for each item that the player is available to purchase from this NPC. Use this table to find out if your trader is giving you a good deal or not. Please note that the values in the below tables are of the average prices in silver coins only and players may encounter NPC’s with better or worse deals. Each trader will not have every item listed for sale.
| Items Sold | Price Range | Image |
|---|---|---|
| Haradric Crafting Table | 30-50 ( |
|
| 2 x Coal | 3-5 ( |
|
| 4 x Glowstone Dust | 2-4 ( |
|
| Copper Ore | 5-9 ( |
|
| Flint | 2-3 ( |
|
| Gold Ore | 17-28 ( |
|
| Iron Ore | 6-10 ( |
|
| Lapis Lazuli | 1-1 ( |
|
| Lava Bucket | 15-25 ( |
|
| Nitre | 5-8 ( |
|
| Silver Ore | 9-15 ( |
|
| Sulfur | 5-8 ( |
|
| Tin Ore | 5-9 ( |
|
| Salt | 12-20 ( |
|
| Diamond | 30-50 ( |
|
| Emerald | 19-31 ( |
|
| Sapphire | 15-25 ( |
|
| Ruby | 15-25 ( |
|
| Opal | 11-19 ( |
|
| Amber | 11-19 ( |
|
| Amethyst | 9-15 ( |
|
| Topaz | 9-15 ( |
Items Bought
Below is a table of values for each item that the player can sell to this NPC. Use this table to earn more money by only selling when the prices are high. Please note that the values in the below tables are of the average prices in silver coins only and players may encounter NPC’s with better or worse deals. You will not be able to sell every item to every trader as they will not want to purchase every item listed below.
| Items Bought | Price Range | Image |
|---|---|---|
| 16 x Torch | 2-3 ( |
|
| Bronze Pickaxe | 5-8 ( |
|
| Bucket | 2-4 ( |
|
| Iron Pickaxe | 6-10 ( |
|
| Stone Pickaxe | 1-1 ( |
Southron Drink Trader
Items Sold
Below is a table of values for each item that the player is available to purchase from this NPC. Use this table to find out if your trader is giving you a good deal or not. Please note that the values in the below tables are of the average prices in silver coins only and players may encounter NPC’s with better or worse deals. Each trader will not have every item listed for sale.
Items Bought
Below is a table of values for each item that the player can sell to this NPC. Use this table to earn more money by only selling when the prices are high. Please note that the values in the below tables are of the average prices in silver coins only and players may encounter NPC’s with better or worse deals. You will not be able to sell every item to every trader as they will not want to purchase every item listed below.
| Items Bought | Price Range | Image |
|---|---|---|
| 2 x Potato | 1-1 ( |
|
| 2 x Sugar Canes | 1-1 ( |
|
| 3 x Melon | 1-1 ( |
|
| 2 x Wheat | 1-1 ( |
|
| Apple | 2-3 ( |
|
| Banana | 2-3 ( |
|
| Bucket | 2-4 ( |
|
| Cherry | 1-1 ( |
|
| Clay Mug | 2-3 ( |
|
| Date | 2-3 ( |
|
| Bucket of Milk | 3-5 ( |
|
| Wooden Mug | 1-1 ( |
|
| Pear | 2-3 ( |
|
| Water Bucket | 3-5 ( |
|
| Ceramic Mug | 2-4 ( |
|
| Wooden Cup | 1-1 ( |
|
| Copper Goblet | 2-4 ( |
|
| Silver Goblet | 8-13 ( |
|
| Golden Goblet | 11-19 ( |
|
| Mango | 1-1 ( |
|
| Lemon | 2-3 ( |
|
| Orange | 2-3 ( |
|
| Lime | 2-3 ( |
|
| Pomegranate | 2-3 ( |
|
| Diamond | 19-31 ( |
|
| Sapphire | 9-15 ( |
|
| Ruby | 9-15 ( |
|
| Pearl | 19-31 ( |
Southron Food Trader

Items Sold
Below is a table of values for each item that the player is available to purchase from this NPC. Use this table to find out if your trader is giving you a good deal or not. Please note that the values in the below tables are of the average prices in silver coins only and players may encounter NPC’s with better or worse deals. Each trader will not have every item listed for sale.
| Items Sold | Price Range | Image |
|---|---|---|
| 2 x Baked Potato | 5-9 ( |
|
| Apple | 2-4 ( |
|
| Banana | 8-13 ( |
|
| Bread | 4-6 ( |
|
| Olive Bread | 5-8 ( |
|
| Cherry | 2-3 ( |
|
| Cooked Chicken | 5-8 ( |
|
| Cooked Fish | 5-8 ( |
|
| Cooked Porkchop | 5-9 ( |
|
| Cooked Rabbit | 5-8 ( |
|
| Cooked Mutton | 5-9 ( |
|
| Cooked Venison | 5-9 ( |
|
| Cooked Camel | 5-8 ( |
|
| Date | 2-3 ( |
|
| Gammon | 5-9 ( |
|
| Kebab | 6-10 ( |
|
| Mango | 8-13 ( |
|
| Melon | 6-10 ( |
|
| Pear | 2-4 ( |
|
| Lemon | 2-4 ( |
|
| Orange | 2-4 ( |
|
| Lime | 2-4 ( |
|
| Plum | 2-4 ( |
|
| Olives | 2-3 ( |
|
| Almond | 2-3 ( |
|
| Marchpane | 5-8 ( |
|
| Chocolate Marchpane | 8-13 ( |
|
| Melon Soup | 9-15 ( |
|
| Shish Kebab | 6-10 ( |
|
| Steak | 5-9 ( |
Items Bought
Below is a table of values for each item that the player can sell to this NPC. Use this table to earn more money by only selling when the prices are high. Please note that the values in the below tables are of the average prices in silver coins only and players may encounter NPC’s with better or worse deals. You will not be able to sell every item to every trader as they will not want to purchase every item listed below.
| Items Bought | Price Range | Image |
|---|---|---|
| 2 x Potato | 1-1 ( |
|
| 6 x Bone Meal | 1-1 ( |
|
| Bucket | 2-4 ( |
|
| Clay Plate | 1-1 ( |
|
| Raw Beef | 2-4 ( |
|
| Raw Chicken | 2-4 ( |
|
| Raw Fish | 2-3 ( |
|
| Raw Porkchop | 2-4 ( |
|
| Raw Rabbit | 2-4 ( |
|
| Raw Mutton | 2-4 ( |
|
| Raw Venison | 2-4 ( |
|
| Water Bucket | 3-5 ( |
|
| Salt | 8-13 ( |
|
| Diamond | 19-31 ( |
|
| Ruby | 9-15 ( |
|
| Topaz | 6-10 ( |
Southron Plant Trader

Items Sold
Below is a table of values for each item that the player is available to purchase from this NPC. Use this table to find out if your trader is giving you a good deal or not. Please note that the values in the below tables are of the average prices in silver coins only and players may encounter NPC’s with better or worse deals. Each trader will not have every item listed for sale.
| Items Sold | Price Range | Image |
|---|---|---|
| Oak Sapling | 2-4 ( |
|
| Spruce Sapling | 2-4 ( |
|
| Birch Sapling | 2-4 ( |
|
| Jungle Sapling | 6-10 ( |
|
| Shire Pine Sapling | 6-10 ( |
|
| Mirk-oak Sapling | 6-10 ( |
|
| Apple Sapling | 8-13 ( |
|
| Pear Sapling | 8-13 ( |
|
| Cherry Sapling | 15-25 ( |
|
| Beech Sapling | 2-4 ( |
|
| Mango Sapling | 23-38 ( |
|
| Banana Sapling | 23-38 ( |
|
| Maple Sapling | 2-4 ( |
|
| Larch Sapling | 2-4 ( |
|
| Date Palm Sapling | 2-4 ( |
|
| Lemon Sapling | 8-13 ( |
|
| Orange Sapling | 8-13 ( |
|
| Lime Sapling | 8-13 ( |
|
| Olive Sapling | 8-13 ( |
|
| Almond Sapling | 8-13 ( |
|
| Poppy | 1-1 ( |
|
| Dandelion | 1-1 ( |
|
| Red Mushroom | 2-4 ( |
|
| Brown Mushroom | 2-4 ( |
|
| Morgul-shroom | 15-25 ( |
|
| Red Sand Gem | 2-4 ( |
|
| Yellow Sand Gem | 2-4 ( |
|
| Harad Daisy | 2-4 ( |
|
| Southbell | 2-4 ( |
Items Bought
Below is a table of values for each item that the player can sell to this NPC. Use this table to earn more money by only selling when the prices are high. Please note that the values in the below tables are of the average prices in silver coins only and players may encounter NPC’s with better or worse deals. You will not be able to sell every item to every trader as they will not want to purchase every item listed below.
| Items Bought | Price Range | Image |
|---|---|---|
| Bucket | 2-4 ( |
|
| Water Bucket | 3-5 ( |
|
| Iron Axe | 6-10 ( |
|
| Stone Axe | 1-1 ( |
|
| Bronze Axe | 5-8 ( |
|
| 6 x Bone Meal | 1-1 ( |
|
| Emerald | 11-19 ( |
|
| Ruby | 9-15 ( |
|
| Amber | 8-13 ( |
Southron Blacksmith

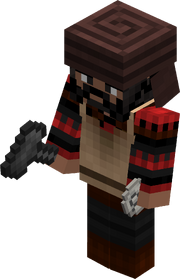
Items Sold
Below is a table of values for each item that the player is available to purchase from this NPC. Use this table to find out if your trader is giving you a good deal or not. Please note that the values in the below tables are of the average prices in silver coins only and players may encounter NPC’s with better or worse deals. Each trader will not have every item listed for sale.
| Items Sold | Price Range | Image |
|---|---|---|
| Haradric Crafting Table | 30-50 ( |
|
| Haradric Scimitar | 11-19 ( |
|
| Haradric Dagger | 7-11 ( |
|
| Poisoned Haradric Dagger | 11-19 ( |
|
| Haradric Spear | 12-20 ( |
|
| Haradric Pike | 12-20 ( |
|
| Haradric Poleaxe | 12-20 ( |
|
| Haradric Helmet | 15-25 ( |
|
| Haradric Chestplate | 24-40 ( |
|
| Haradric Leggings | 20-33 ( |
|
| Haradric Boots | 13-21 ( |
|
| Blacksmith Hammer | 14-23 ( |
|
| 8 x Iron Bars | 15-25 ( |
|
| 8 x Bronze Bars | 15-25 ( |
|
| 4 x Crossbow Bolt | 2-4 ( |
|
| Iron Crossbow | 11-19 ( |
|
| Bronze Crossbow | 9-15 ( |
|
| Near Harad Horse Armour | 19-31 ( |
Items Bought
Below is a table of values for each item that the player can sell to this NPC. Use this table to earn more money by only selling when the prices are high. Please note that the values in the below tables are of the average prices in silver coins only and players may encounter NPC’s with better or worse deals. You will not be able to sell every item to every trader as they will not want to purchase every item listed below.
| Items Bought | Price Range | Image |
|---|---|---|
| Iron Ingot | 2-4 ( |
|
| 2 x Coal | 1-1 ( |
|
| Gold Ingot | 11-19 ( |
|
| Copper Ingot | 2-4 ( |
|
| Tin Ingot | 2-4 ( |
|
| Bronze Ingot | 2-4 ( |
|
| Diamond | 19-31 ( |
|
| Emerald | 11-19 ( |
|
| Ruby | 9-15 ( |
|
| Amber | 8-13 ( |
|
| Leather | 2-3 ( |
|
| Bottle of Poison | 8-13 ( |
Gallery
")
")
")
")
")
")
")
")
")
")
Speech Bank
Southron Blacksmiths
Friendly
- Welcome, my friend! What would you like today?
- I forge the finest arms in all the Southlands!
- Have you tried the bronze corselets, Person?
- I hear the clinking of silver in your pockets!
- Men come from leagues around to buy my scimitars!
- Good day to you, Person! I have much that may interest you!
- I forged a scimitar this morning just for you!
- My scimitars are sharp, my daggers keen, and my corselets polished!
- You need a helmet to keep the sun off your head, my friend.
- Do you have anything to trade, Person?
Hostile
- No business for you!
- Begone, villain from the North!
- You are an enemy of Harad, Person!
- Be off before I strike you with my burning hammer!
- The only scimitar fit for you would be one embedded in your belly!
- I would not trade with you even if all my coffers lay empty!
- No trade for you, Person!
- Get yourself out of our lands!
- You have the stink of Gondor about you!
Neutral
- I will not forge arms for a stranger, Person.
- I trade only with the folk of Haradwaith.
- You shall have to go elsewhere for your weapons.
- What are you even doing here, my friend?
- You are not one of our people, my friend.
- I have polished corselets aplenty, but only for the friends of Harad.
- You are a stranger to our lands, Person.
All Other Southron Traders
Friendly
- Greetings, Person! I hope that you will buy something from my stall.
- What is it that you wish to buy? For I sell treasures from all over the world!
- We traders of Harad are well travelled, and for all that, we have many goods to sell you.
- I am prepared to barter silver with you, Person. What is it that you need?
- Welcome to the bazaar, Person! What can I do for you today?
- Fantastic treasures from the ends of the earth, for just a few silver coins!
- Welcome, Person! Welcome! I offer you many fine goods from these lands!
- For a few silver coins, I can sell you some fantastic treasures!
- Welcome to my stall! What can I get you?
- I offer you many treasures from many lands!
Hostile
- You have travelled all this way, but it is for naught. I will not trade with an enemy of Harad!
- If the Men of Gondor are your allies, you are my enemy, Person!
- You made a bad choice in traversing the desert to the lands of Harad.
- I shall not trade my wares or silver with you. Sell your wretched goods elsewhere!
- The silver of Harad will not ever find its way into your hands, Person!
- There is nothing for the likes of you to buy!
- I will sell nothing to the scum of Gondor!
- You will get no goods from me, Person!
- Off with you, Gondorian scum!
- Begone from these lands, Person! Your kind is not welcome here!
- Off with you, Person!
Silver Coin • Trader Respawning • Trading • Travelling Traders Item traders:
Good Travelling item traders:
Good Unit traders:
Good |